All product image guides Vintage product condition photography

Let the buyer find the flaw you describe.

For a one-off vintage object, the condition belongs to the individual item. A close-up without an orientation view can confuse buyers just as much as a flattering overview that hides damage. Pair clear photographs with plain, specific notes.

Explore a clearly separate vintage scene concept Two free credits when you sign up. Review the result before publishing.
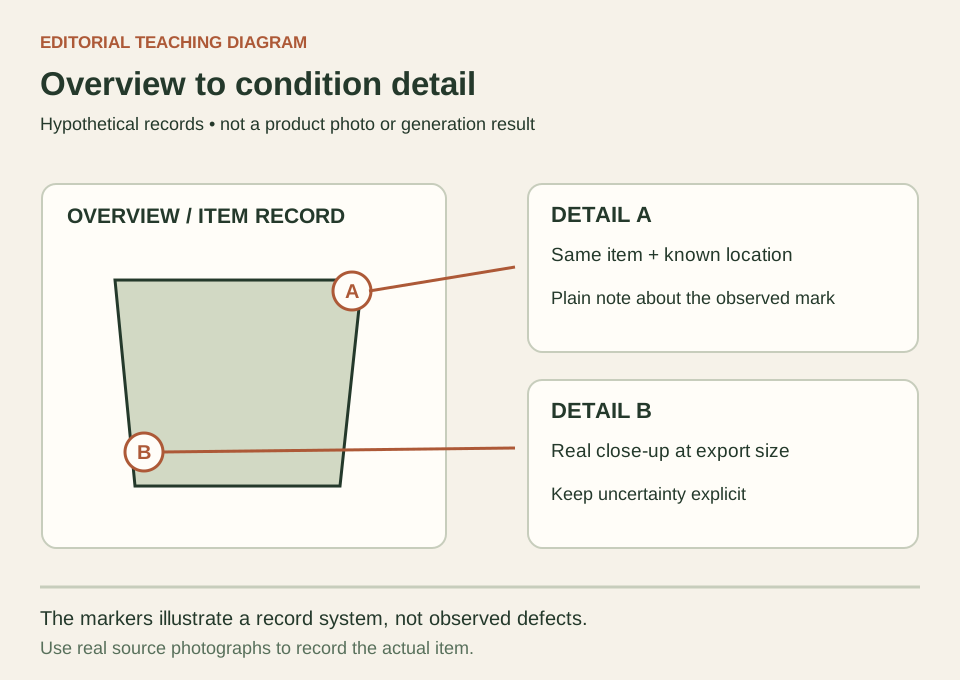
Teaching diagram connecting an overview of a fictional vintage object to two marked detail locations
EDITORIAL CONCEPT
01 / EXAMPLEILLUSTRATIVE CONCEPT
What this shows

An overview tells the buyer where a detail belongs.

This diagram links a full item to two condition close-ups. Its job is to make the evidence traceable. The schematic does not grade an object, date it, identify its maker or show a real restoration.

Teaching diagram connecting an overview of a fictional vintage object to two marked detail locations
Editorial conceptOriginal teaching diagram, not a product photograph, Fayvoro generation or customer result. The marked areas are hypothetical shot locations. They are not observed defects, an appraisal or proof of age.

This image is an editorial concept made for the site. It is not a Fayvoro generation or customer result. AI can change product shape, color, packaging, labels, and text. Check every important detail against the real item.

02 / A PRACTICAL WORKFLOWSTART WITH YOUR PHOTO
01

Inspect this item and create a condition map

Assign a stable item identifier before shooting. Inspect the front, back, underside, joints, interior and any moving part relevant to the listing. Write down observations in plain terms: a chipped rim, missing button, repaired seam or mark on the lower right corner. Do not replace these observations with one unexplained adjective such as excellent. Record what you could not inspect so an incomplete review does not become an all-clear claim.

Choose an overview that orients the buyer, then associate each notable mark with a detail frame and description. Etsy's vintage-shop guidance encourages photographs of specific flaws and maker marks, alongside a clear condition explanation. Treat that as a reason to provide real evidence, not permission to infer an era from a generated scene. Keep known provenance, maker information and condition as separate records; photographs alone cannot settle every one of those questions.

  • Use one exact item ID across photographs, condition notes and the sale listing.
  • Pair each disclosed mark with a location view and a readable close-up.

Plan luggage product photographs — Plan luggage images with actual wheels, collapsed handle, interior and measured closed dimensions. Keep room or travel scenes separate from airline fit and durability evidence.

02

Make honest details readable at listing size

Photograph the object as a whole before moving in. Keep enough surrounding material in each close-up for the location to make sense. For a small chip, include the rim section and then a closer view; for a repaired seam, show the garment orientation before the stitches. If changing the light helps reveal a mark, retain that revealing frame rather than smoothing the surface until the flaw disappears.

Check the actual exported listing images on a phone. A tiny mark visible only in your full-resolution archive may be unreadable after the marketplace crop. Add another real detail photograph when needed and keep the description consistent with it. Clean dust only when appropriate for the object and record any substantive preparation. Do not manufacture a before-and-after story from unrelated items, edits or generated restorations.

03

Keep styling separate from evidence of the sold object

A background concept can help you plan how to style an object, but the buyer's condition record must remain factual. If the destination permits this concept role, try one rights-cleared source in Fayvoro only after keeping the real gallery complete. One input image guides one attempt; the service cannot inspect the hidden underside, date the item, authenticate a maker or fill in a missing condition view.

Compare a scene candidate against every visible original feature: chips, fading, repair lines, maker marks, edges and proportions. Reject a result that erases damage or implies matching pieces that are not included. For a one-off resale listing, retaining the original photograph may be the best decision. A generated polished surface does not establish restoration quality, and an old-looking setting does not establish that the item is vintage.

Direction to try

A useful starting note.

Use this as a starting point, then adjust it for your own product. No prompt can guarantee exact product details.

Use my uploaded photo only to explore one clearly identified styling concept for this exact vintage item. Place it on a plain surface with gentle light, leaving its outline visible. Do not remove wear, invent repairs, add matching pieces or create maker marks. I will keep real overview and condition photographs as the factual sale evidence and check the channel's rules before any concept use.
Before you publish

Check the details.

  • The same individual item appears in all factual views.
  • Each disclosed flaw has an overview location and readable detail.
  • Written condition notes agree with the exported photographs.
  • Maker, age, provenance and restoration claims have separate support.
  • No generated scene replaces a missing condition view or erases damage.
Common questions

A few things to know.

Is one close-up of a flaw enough?

Keep a wider view that locates it as well. A very tight photograph can show texture without revealing which edge or side it belongs to. The buyer should connect the note, the full object and the exact detail without guessing.

Can I use AI to remove a defect for the cover?

Do not use a changed condition image to represent the particular item sold. Preserve the real damage in the factual gallery. If a concept is permitted for another purpose, identify it clearly and keep it separate from condition evidence.

Does a vintage-looking image prove an item's age?

No. Lighting, color treatment and a generated setting do not establish when an object was made. Use actual provenance or appropriate maker records for age claims and retain uncertainty when those records are incomplete.

Make your image
with intention.

Explore a clearly separate vintage scene concept