All product image guides Embroidered Patch Product Photography

Make the stitching and the attachment option readable.

Patch artwork is not the same thing as the stitched product. A merch shop needs photographs of thread coverage, edge finish and the supplied backing. A styled scene can then suggest a collection without pretending the patch was attached or tested.

Explore a scene from your real photo Two free credits when you sign up. Review the result before publishing.
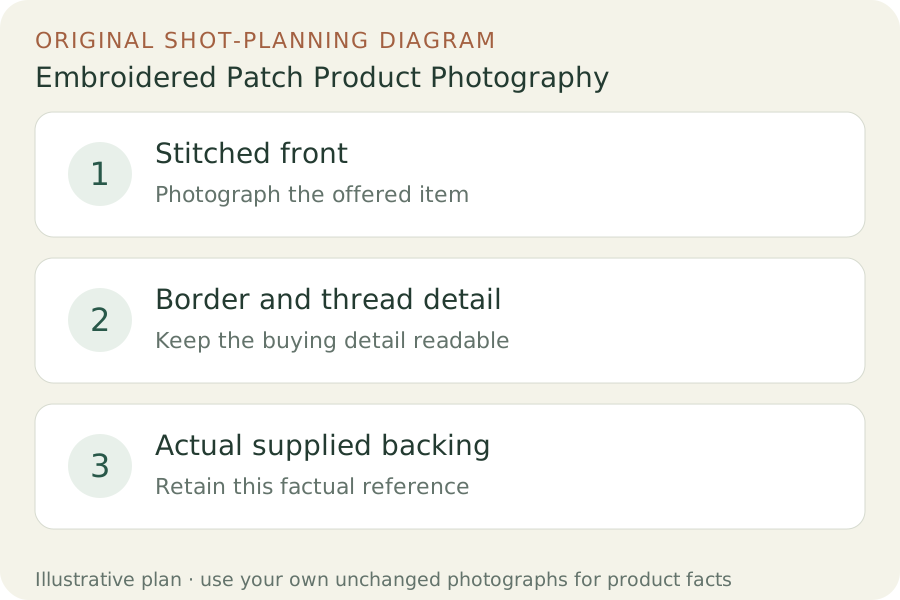
Original teaching diagram: Stitched front, Border and thread detail, Actual supplied backing
EDITORIAL CONCEPT
01 / EXAMPLEILLUSTRATIVE CONCEPT
What this shows

Give each photograph one clear job.

Use the three labeled views to plan your factual gallery. The outlines show composition roles only; they contain no observed dimensions, verified materials or performance measurements. Keep real photographs beside any secondary scene candidate.

Original teaching diagram: Stitched front, Border and thread detail, Actual supplied backing
Editorial conceptOriginal teaching diagram for shot planning. Illustrative outlines, not a photograph of inventory, a Fayvoro output or a customer example.

This image is an editorial concept made for the site. It is not a Fayvoro generation or customer result. AI can change product shape, color, packaging, labels, and text. Check every important detail against the real item.

02 / A PRACTICAL WORKFLOWSTART WITH YOUR PHOTO
01

Match the embroidery and backing to the selected offer

Record the design version, physical size, backing type and border finish before shooting. Photograph the actual stitched sample or sale stock rather than presenting the digital design file as a finished patch. Keep the selected backing visible in a separate rear photograph. Similar front artwork does not make an iron-on patch, sew-on patch and hook-and-loop version interchangeable.

Dutch Label Shop lists embroidery coverage, edge choices and several backing options. Use your own actual production choices in the gallery. Photograph small text and thin lines as they were stitched, even if they are less sharp than the original artwork. A generated scene should not silently convert an embroidered surface into a smooth printed badge.

Plan apron product photographs — Photograph apron body measurements, actual neck adjustment, waist ties and pocket construction. Keep kitchen styling separate from fit, fabric and protection evidence.

02

Let side light reveal thread without exaggerating it

Place the patch flat and nearly square to the camera for its design overview. Add a closer frame with soft side light that shows raised thread and the border. Keep the whole outline in at least one image so the buyer can locate the detail. Avoid sharpening until the thread looks like a thick cord or retouching stitches to improve an imperfect letter.

Photograph the actual rear and any separately supplied attachment piece. If you show an applied patch, use a real example, identify the method and say whether the garment is included. Do not stage an unattached patch in a way that looks permanently fixed. A photograph cannot establish wash durability, adhesive strength or suitability for every textile. Follow the relevant maker information separately for actual application.

03

Try merch styling before suggesting an application result

Use one real patch image for a Fayvoro display scene, with a plain card or desk surface and the design unobstructed. This page does not claim that the tool digitizes embroidery, reproduces stitch paths or proves an iron-on result. Keep the real close-up and backing photograph outside the attempt.

Compare every letter, color boundary, border shape and visible stitch direction. Reject invented threads, repaired lettering or an added garment attachment. If a scene suggests an application, it must remain clearly identified as a concept and must not replace a real applied sample. The original product photograph remains the safer choice when artwork details are hard to inspect.
Direction to try

A useful starting note.

Use this as a starting point, then adjust it for your own product. No prompt can guarantee exact product details.

Use my photograph of this exact embroidered patch for a simple merch-display scene on a matte card or desk. Keep the stitch texture, design and border visible. Do not attach it to clothing, add lettering or alter thread colors. I will compare the candidate with the actual front and backing photographs.
Before you publish

Check the details.

  • Front photograph shows stitched production rather than only artwork.
  • Backing option matches the selected SKU.
  • Thread coverage and edge finish remain visible.
  • Applied garment examples are real and clearly identified.
  • Scene does not imply adhesive or wash durability testing.
Common questions

A few things to know.

Can Fayvoro make a finished patch from artwork?

A generated picture would be an illustration, not manufactured embroidery. Photograph a real patch if the listing needs to show actual thread, border and backing.

Do front photos distinguish iron-on and sew-on versions?

Not necessarily. Add real rear photographs and name the chosen backing so shoppers know which option they receive.

Can a generated jacket scene prove attachment quality?

No. Use an actual applied sample and the relevant maker instructions. A scene cannot establish adhesion or wash performance.

Make your image
with intention.

Explore a scene from your real photo