PRODUCT STORIES / A CREATIVE GUIDE

Product Photography Camera Settings

Choose settings from the detail you need.

There is no universal product-photography exposure. A stationary item on a supported camera lets you test settings against label detail, surface highlights and the actual lighting.

Sign up for 2 free credits · Your starting direction is included.See the example
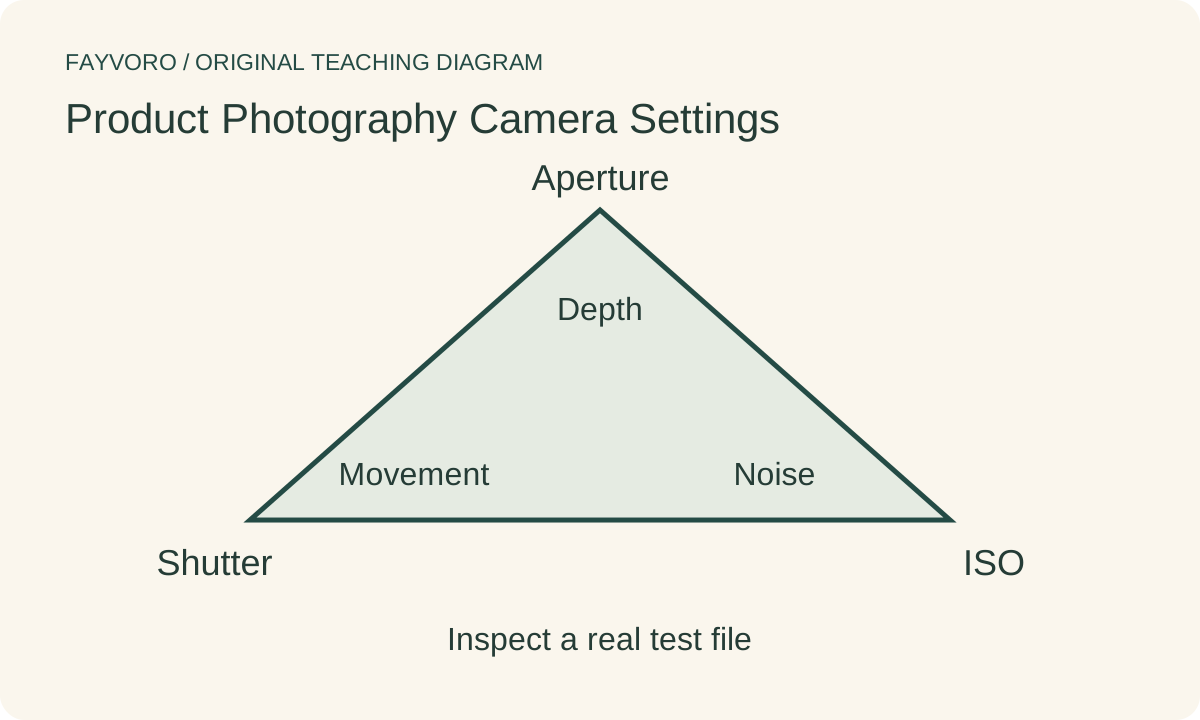
Exposure triangle linking aperture to depth, shutter to movement and ISO to noise, with an actual-file inspection gate.
EDITORIAL CONCEPT
01 / EXAMPLEILLUSTRATIVE CONCEPT
What this shows

Three controls, different tradeoffs.

The triangle names decisions; it does not calculate exposure or simulate a camera.

Exposure triangle linking aperture to depth, shutter to movement and ISO to noise, with an actual-file inspection gate.
Editorial conceptOriginal teaching diagram. It is not a measured lighting test, product photograph, Fayvoro result or customer case.

This image is an editorial concept made for the site. It is not a Fayvoro generation or customer result. AI can change product shape, color, packaging, labels, and text. Check every important detail against the real item.

YOUR STARTING IDEA

Take the direction. Make it your own.

Use my clear real product photograph as the reference for one simple secondary scene. Keep the whole item and its label visible. I will inspect actual product detail rather than treating camera terms in the prompt as measured settings.
Add your reference photo in the studio, then adjust the direction.
Before you publish

Compare the result with your real product and your destination’s requirements.

  • Aperture is chosen for named front and rear details.
  • Motion and exposure are tested under the actual light.
  • Clipping is checked on product detail, not brightness alone.
  • Original capture settings and approved photo are retained.
02 / A PRACTICAL WORKFLOWSTART WITH YOUR PHOTO
01

Define the sharp detail before the exposure

Pick the important front and rear details the frame must show, then choose an initial aperture that can include them. Use the camera manual to set the mode and focus behavior. Record the lens, camera position and starting settings so a change has a known baseline.

Adobe describes aperture, shutter speed and ISO as the exposure triangle. These controls also affect different visible problems: depth of field, motion blur and noise. A brighter preview alone does not tell you which control is appropriate.

Camera Strap Product Photography — Lay out the real attachment ends and supplied anchors, record adjustment state and keep camera compatibility separate from scene styling.

02

Adjust one variable under the actual light

For a static item and stable support under continuous light, a longer shutter time may let you keep an appropriate aperture and modest ISO. If the item, surface or camera moves, inspect blur and shorten the exposure or improve stability instead of relying on sharpening later.

Flash adds its own sync and duration constraints. Follow camera and light instructions, and check for incomplete illumination rather than transferring continuous-light settings blindly. This guide intentionally provides no fixed f-number, shutter or ISO for every setup.

03

Check highlights and factual lettering

Inspect the histogram and highlight warning where available, then inspect the actual product detail. A white background touching the edge of a histogram is a different concern from a label character or material highlight losing useful information.

Keep a reference file with its capture settings, and compare close detail plus the intended display size. When changing the lighting, retest exposure; the old accepted settings may no longer represent the current scene.

04

Treat a generator setting as a different control

Fayvoro does not operate your camera or apply aperture, shutter speed and ISO to a measured capture. Its studio creates scene candidates from a reference. Start from a clear real photo, inspect the generated product and retain the capture settings with your originals.

Common questions

A few things to know.

What settings should I copy?

Use the subject, lens, light and support to make a real test. This guide does not prescribe one exposure recipe for all products.

Does increasing ISO recover detail?

It can brighten the recorded image, but does not establish lettering or texture missing from the capture. Inspect noise and genuine detail.

Can I set a real aperture in Fayvoro?

No measured camera operation is provided. Photography terms can describe direction, but the output remains a generated image to review.

Make your image with intention.