All product image guides Product photo shadows

Let the shadow explain where the product sits.

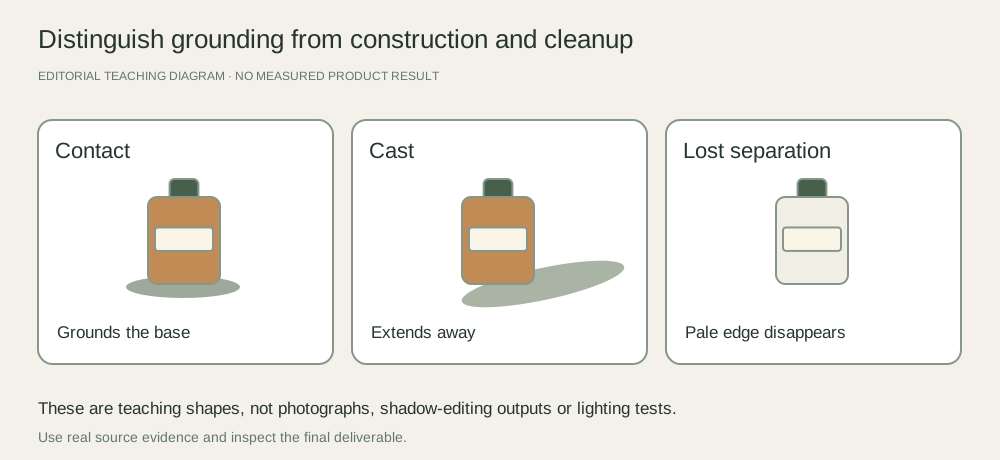
A shadow can ground the item or separate a pale edge from a pale background. Removing every dark region can make a product float or erase genuine construction. Identify the shadow’s job before changing it.

Explore one secondary product scene Two free credits when you sign up. Review the result before publishing.
Product-shadow teaching comparison showing a contact shadow at the base, a cast shadow to one side and a lost pale edge when all separation is removed
EDITORIAL CONCEPT
01 / EXAMPLEILLUSTRATIVE CONCEPT
What this shows

Contact, cast shadow and product detail are separate.

These simplified shapes are an editorial teaching comparison. They are not photographs, generated shadow variants or measured lighting results.

Product-shadow teaching comparison showing a contact shadow at the base, a cast shadow to one side and a lost pale edge when all separation is removed
Editorial conceptOriginal teaching diagram. It is not a generated product image, a customer example, or a measured test result.

This image is an editorial concept made for the site. It is not a Fayvoro generation or customer result. AI can change product shape, color, packaging, labels, and text. Check every important detail against the real item.

02 / A PRACTICAL WORKFLOWSTART WITH YOUR PHOTO
01

Identify which dark region you are changing

A contact shadow anchors the base where it touches the surface. A cast shadow extends away from the subject. A dark opening, engraved mark or seam may be actual product detail rather than a lighting defect. Compare with the real item before using an eraser or a background-removal tool.

Record whether the problem is a distracting background shape, unreadable product text or insufficient separation around a pale edge. Broncolor’s white-on-white packshot demonstration uses controlled shadow to keep white product edges from disappearing against a white background.

Black on Black Product Photography — Plan dark product photos with readable silhouette, controlled edge light and real surface detail.

02

Test the light before repairing the export

Make a baseline capture, then change one light position, diffusion arrangement or fill at a time. Keep product and camera stable. Compare the outline and important detail instead of only whether the background is brighter. A broader apparent light source often changes the shadow transition; test the actual setup rather than treating the diagram as a lighting recipe.

Keep a truthful surface-contact cue when the image is meant to show a product resting on a surface. Avoid a support arrangement that alters the product’s geometry just to remove a shadow. If the source and background need separate exposure treatment, retain both as documented real evidence in your editing workflow.

03

Check any cleanup or generated scene against geometry

Look for a detached shadow, a direction inconsistent with highlights, multiple unexplained shadows and a missing contact point. Confirm that cleanup did not remove a handle opening or make the item look suspended. If the product must be isolated for layout, agree whether a separate shadow layer is needed.

Fayvoro is not a physically calibrated relighting or shadow-editing service. A generated scene may make plausible-looking shadows that still misrepresent support, transparency or shape. Keep a real factual capture and approve a scene only after checking those cues.
Practical decision worksheet

Decide which shadow deserves a change

Use the real product and capture to distinguish lighting from construction.

Need or findingNext actionEvidence to check
Contact shadowKeep a truthful grounding cue when the item rests on a surface.The base does not appear detached or floating.
Distracting cast shadowMake a controlled light test before a local cleanup.Direction and softness still agree with the scene.
Dark hole or seamTreat it as product detail until the real item proves otherwise.Cleanup does not erase construction.
Pale edge disappearsTest contrast and lighting while retaining the real outline.The product is not cut thinner or overexposed.

Use the worksheet in your existing capture, editing or storefront workflow. Fayvoro’s scene studio is a separate optional step and does not perform the editing or platform actions described here.

Direction to try

A useful starting note.

Use this as a starting point, then adjust it for your own product. No prompt can guarantee exact product details.

Explore a simple secondary product scene with a clear resting surface and restrained light. I will check the contact point, cast-shadow direction, highlights and product openings against my real reference before using it.
Before you publish

Check the details.

  • Contact shadow, cast shadow and product detail are identified separately.
  • A controlled real lighting test checks edge separation.
  • Cleanup retains genuine openings, seams and contact geometry.
  • Any generated shadow is reviewed rather than assumed physically accurate.
Common questions

A few things to know.

Should product photos always be shadow-free?

No. A useful shadow can communicate surface contact and shape. Follow the destination’s image rules and the buyer question instead of erasing all shadow.

Does a white background require lost edges?

No. Test light and separation so a pale product still has a readable truthful outline. Overexposure and aggressive cleanup can both erase it.

Can Fayvoro repair only my existing shadow?

It generates a new flat image rather than a local shadow-editing layer or calibrated relighting operation.

Make your image
with intention.

Explore one secondary product scene