All product image guides Acrylic Keychain Product Photography

Let the transparent edge and the real reverse do their jobs.

An acrylic charm can look cloudy with its protective film still attached, and its reverse may use a different design. A clear product gallery should answer those details before a collector scene adds mood. Exact artwork and hardware need real close-ups.

Explore a scene from your real photo Two free credits when you sign up. Review the result before publishing.
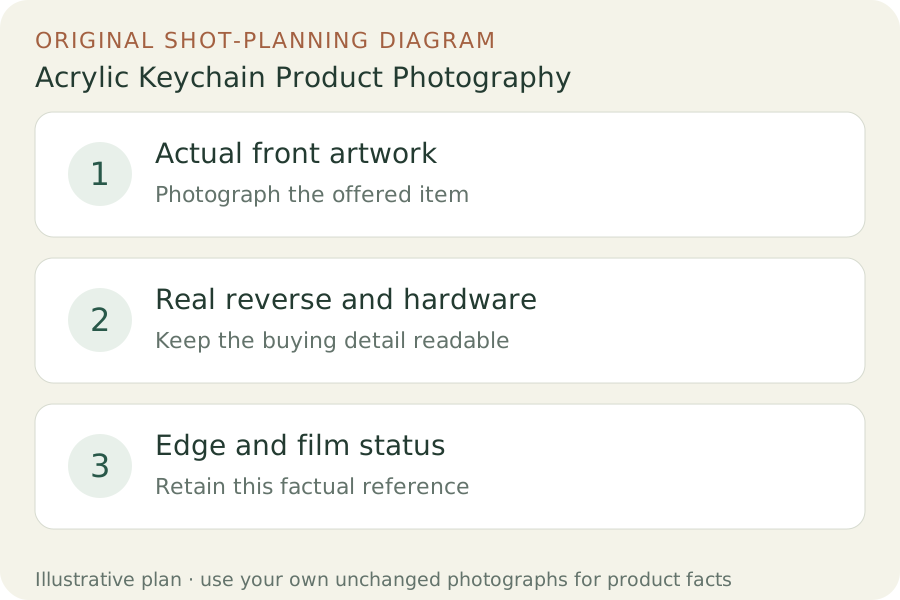
Original teaching diagram: Actual front artwork, Real reverse and hardware, Edge and film status
EDITORIAL CONCEPT
01 / EXAMPLEILLUSTRATIVE CONCEPT
What this shows

Give each photograph one clear job.

Use the three labeled views to plan your factual gallery. The outlines show composition roles only; they contain no observed dimensions, verified materials or performance measurements. Keep real photographs beside any secondary scene candidate.

Original teaching diagram: Actual front artwork, Real reverse and hardware, Edge and film status
Editorial conceptOriginal teaching diagram for shot planning. Illustrative outlines, not a photograph of inventory, a Fayvoro output or a customer example.

This image is an editorial concept made for the site. It is not a Fayvoro generation or customer result. AI can change product shape, color, packaging, labels, and text. Check every important detail against the real item.

02 / A PRACTICAL WORKFLOWSTART WITH YOUR PHOTO
01

Record printing sides, finish and included hardware

List the actual print arrangement: one side, matching two sides or different front and back artwork. Photograph both real sides, even when the silhouette looks symmetric. Keep small text in its genuine orientation. Record the selected clasp or ring and any included chain; a stock accessory photograph can misrepresent a hardware option.

Vograce explains that many acrylic charms have protective film, with exceptions for some epoxy products. Check your actual product rather than applying that statement universally. Note whether a photographed sample has had its film removed and whether sale stock ships with film. Cloudiness, a peel corner or a shiny coating should not be digitally transformed into another finish.

02

Separate clear edges from artwork and glare

Make a nearly front-facing artwork photograph, then a slightly angled edge view against a background that lets the transparent border remain visible. Move a broad white reflection until it no longer covers the printed face. Avoid a strong color behind clear acrylic when it would make buyers mistake the background color for the print.

Photograph the hardware attachment in a closer frame and keep the charm fully visible in an overview. For film-removal explanation, use a real sample and clearly identify what changed. Do not remove coating or film from sale units without considering their actual state. A digitally brightened edge is not evidence of material thickness, scratch resistance or durability.

03

Use a scene as presentation, not a new print proof

Upload one real charm photograph and ask Fayvoro for a plain collector-display surface. Avoid a complicated bag attachment if exact hardware paths matter. The tool attempts one composition from one image; it does not combine real front and back photographs or certify double-sided registration.

Review artwork orientation, silhouette, transparent border, hole position, ring count and clasp. Reject altered lettering, a mirrored reverse, an opaque edge or a changed chain. Keep factual reverse and edge photographs in the listing. A generated scene should not become the proof you send to the manufacturer for printing or cutting.
Direction to try

A useful starting note.

Use this as a starting point, then adjust it for your own product. No prompt can guarantee exact product details.

Use my actual acrylic keychain photograph for a quiet collector-display scene on a neutral matte surface. Keep the artwork, clear edge and hardware visible with soft light. Add no print, chain, reflection text or bag attachment. I will compare the design and border with my real front and back photographs.
Before you publish

Check the details.

  • Front and reverse show the actual printing arrangement.
  • Protective-film state is recorded for the sample and sale stock.
  • Clear edge has not become an invented opaque border.
  • Ring, hole and clasp agree with the real hardware.
  • No generated image is used as a production print proof.
Common questions

A few things to know.

Should I photograph the protective film?

Show or explain the actual shipping state, and distinguish a display sample with film removed. Follow the exact maker’s information rather than assuming every acrylic finish uses the same film.

Can a single front photo document a different reverse design?

No. Turn the real charm over and photograph its reverse. A generated back is an imagined image, not the supplied print.

Can a scene certify artwork registration or thickness?

No. Those are manufacturing details for real measurements and production records. Retain the actual edge and artwork photographs.

Make your image
with intention.

Explore a scene from your real photo